Azure Hints and Tips – Azure App Service
As Azure evolves and grows into a platform that underpins digital transformation, we will be looking to share a range of hints and tips across different channels to support you utilising the Azure platform to support your transformation. Over the past 12-18 months, we have seen the usage of Azure grow considerably and foresee it to exceed all expectations over the next year.
If you’ve used Azure, you’ve more than likely used Azure App Service to easily host web applications, REST APIs and mobile back ends. In this set of tips, we’ve pulled out the top three tips for Azure App Service. They include easily working with files in the console, easily setting up staging environments and swapping between them, and routing traffic to different versions of your app to ‘Test in Production’. We will also cover how you can implement performance testing, best practices for App Settings in Azure App Service and cloning a web app that is especially helpful if you have customers all over the world.
Working with Files in Azure App Service
We’ll look at the files inside an Azure App Service web site and how you can easily work with them.
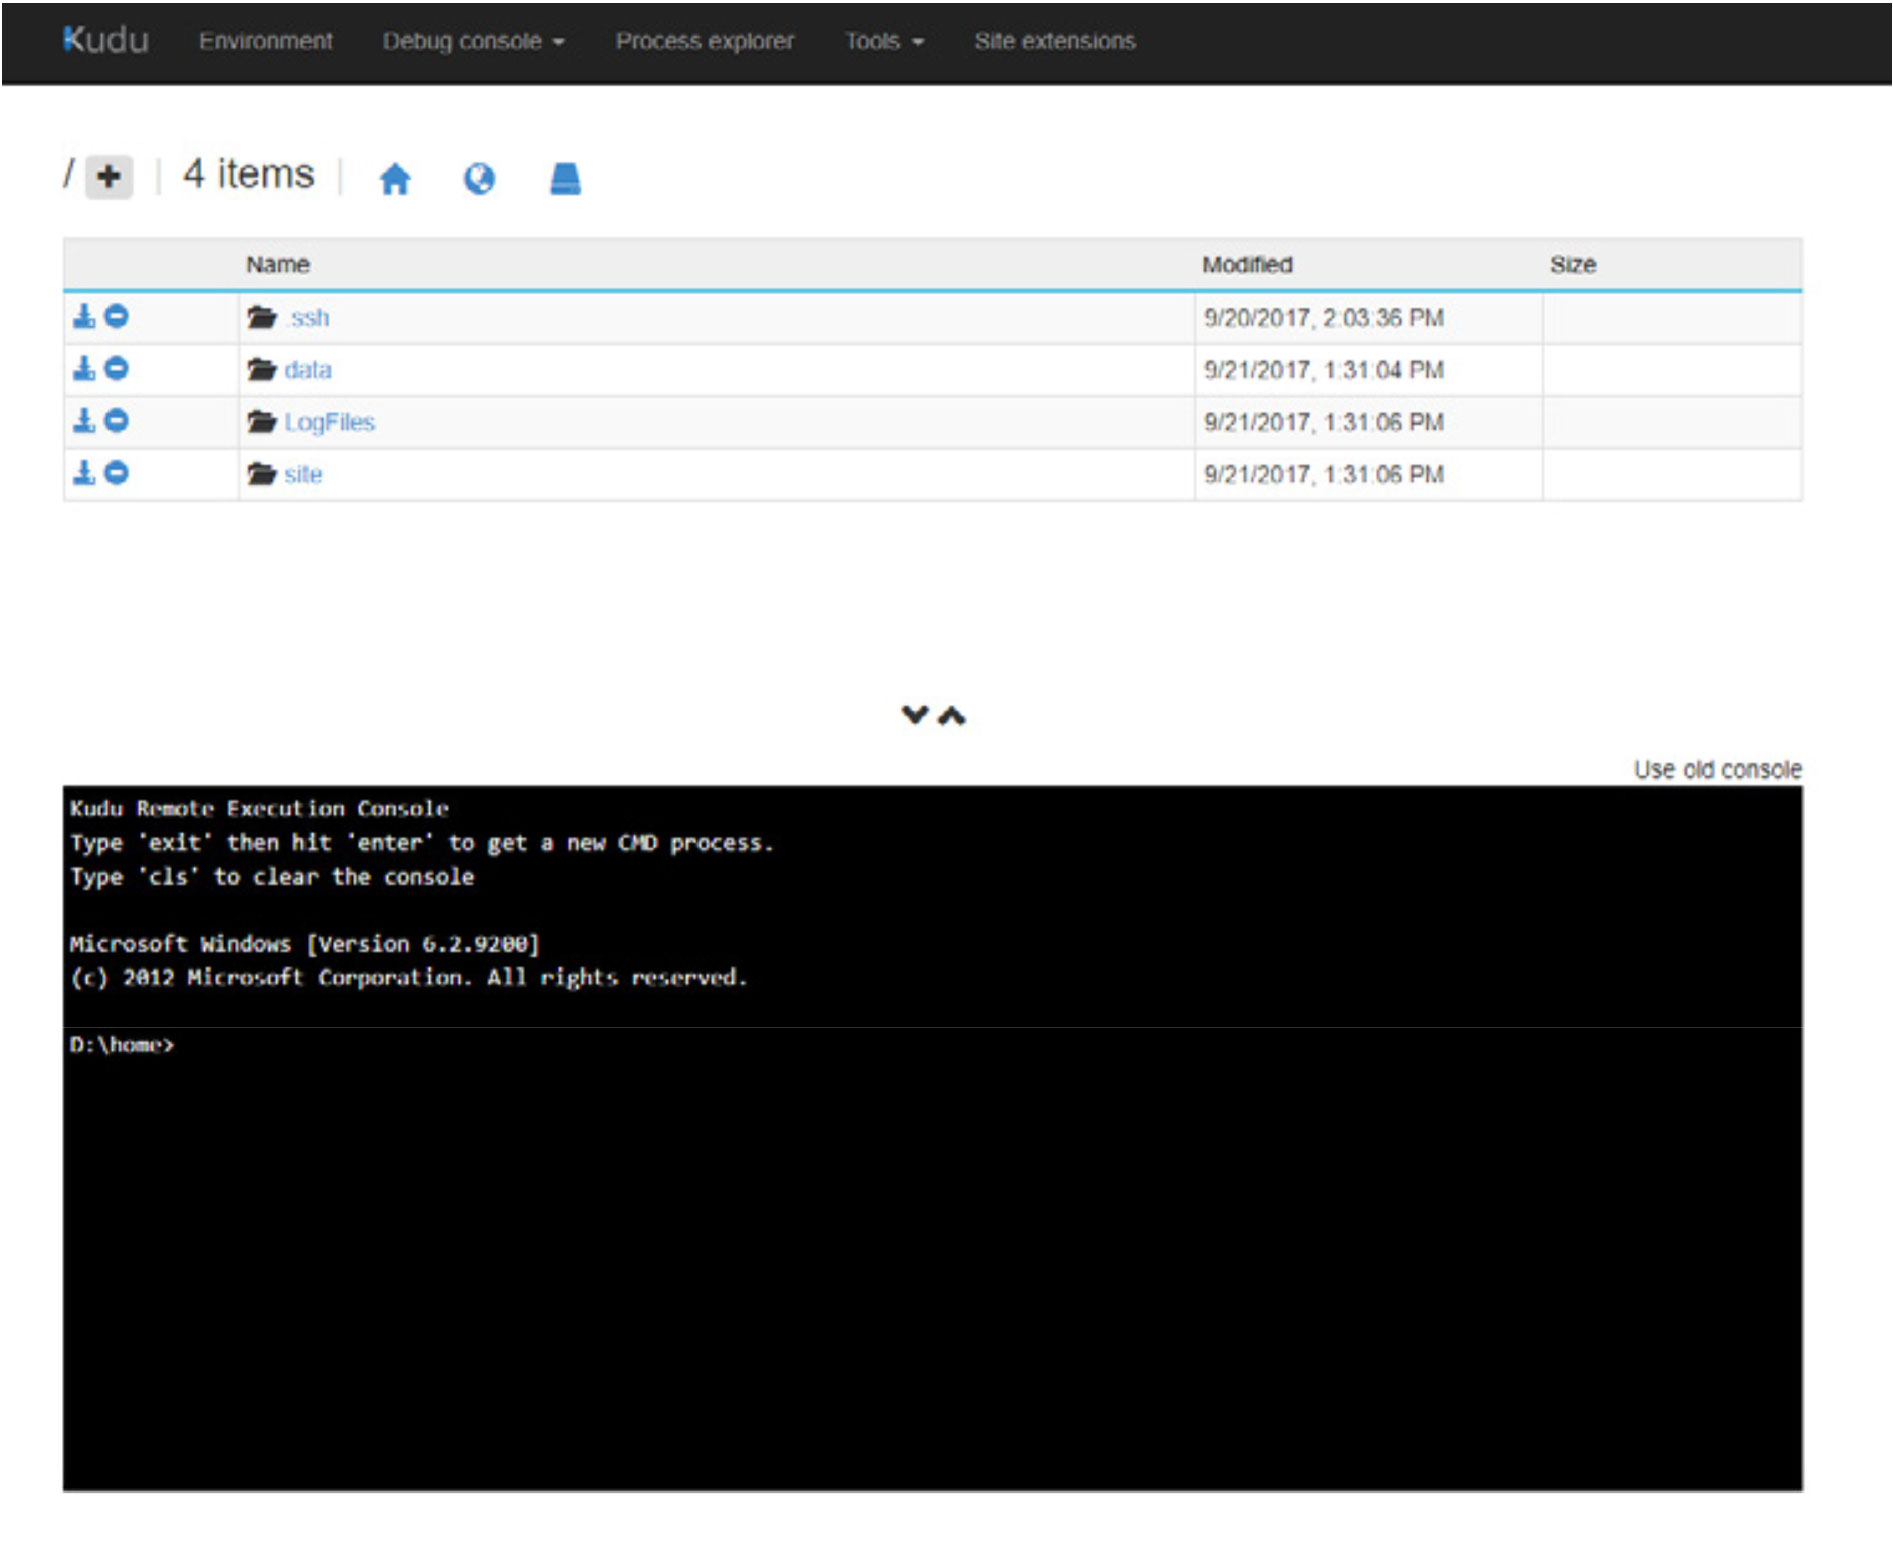
Console Access to my App Service
Go to the Azure Portal and select my App Service. Click on Console under Development Tools to have a command prompt to quickly work with my Azure App Service.
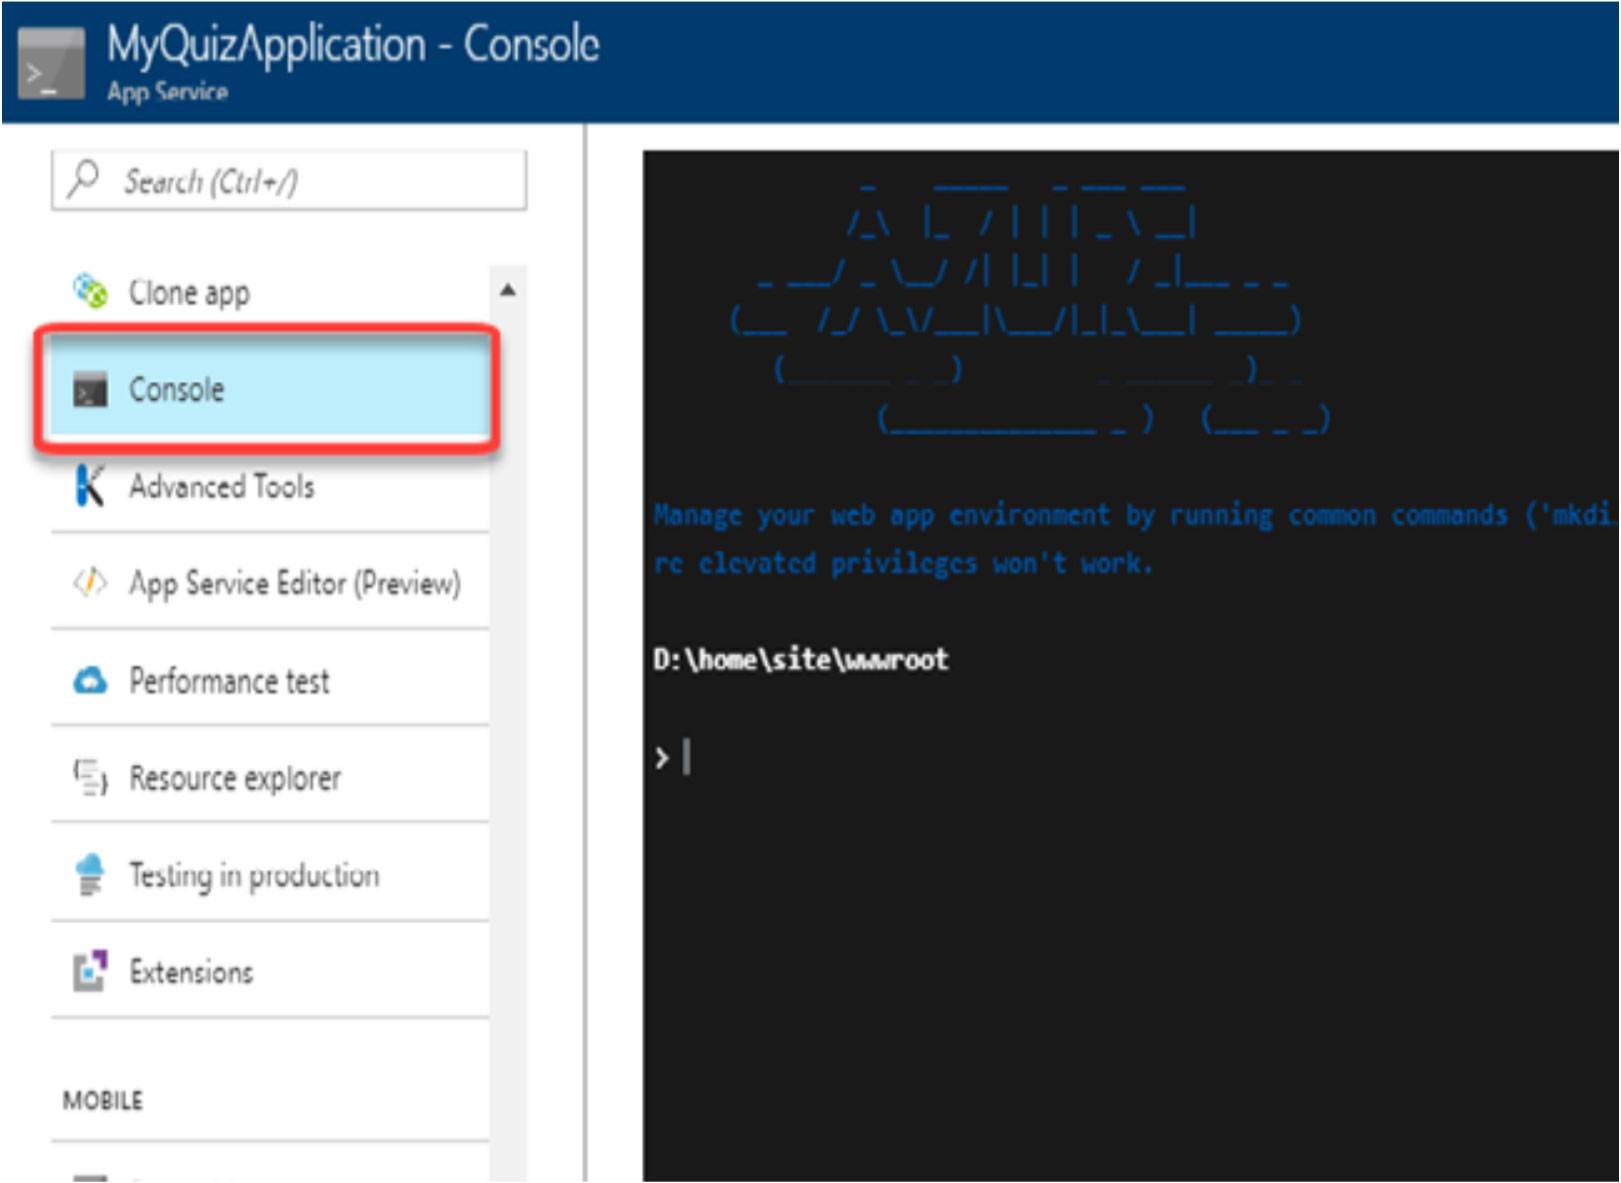
As you can tell from the screenshot, start in D:\home\site\wwwroot. and type dir to see a current directory listing.
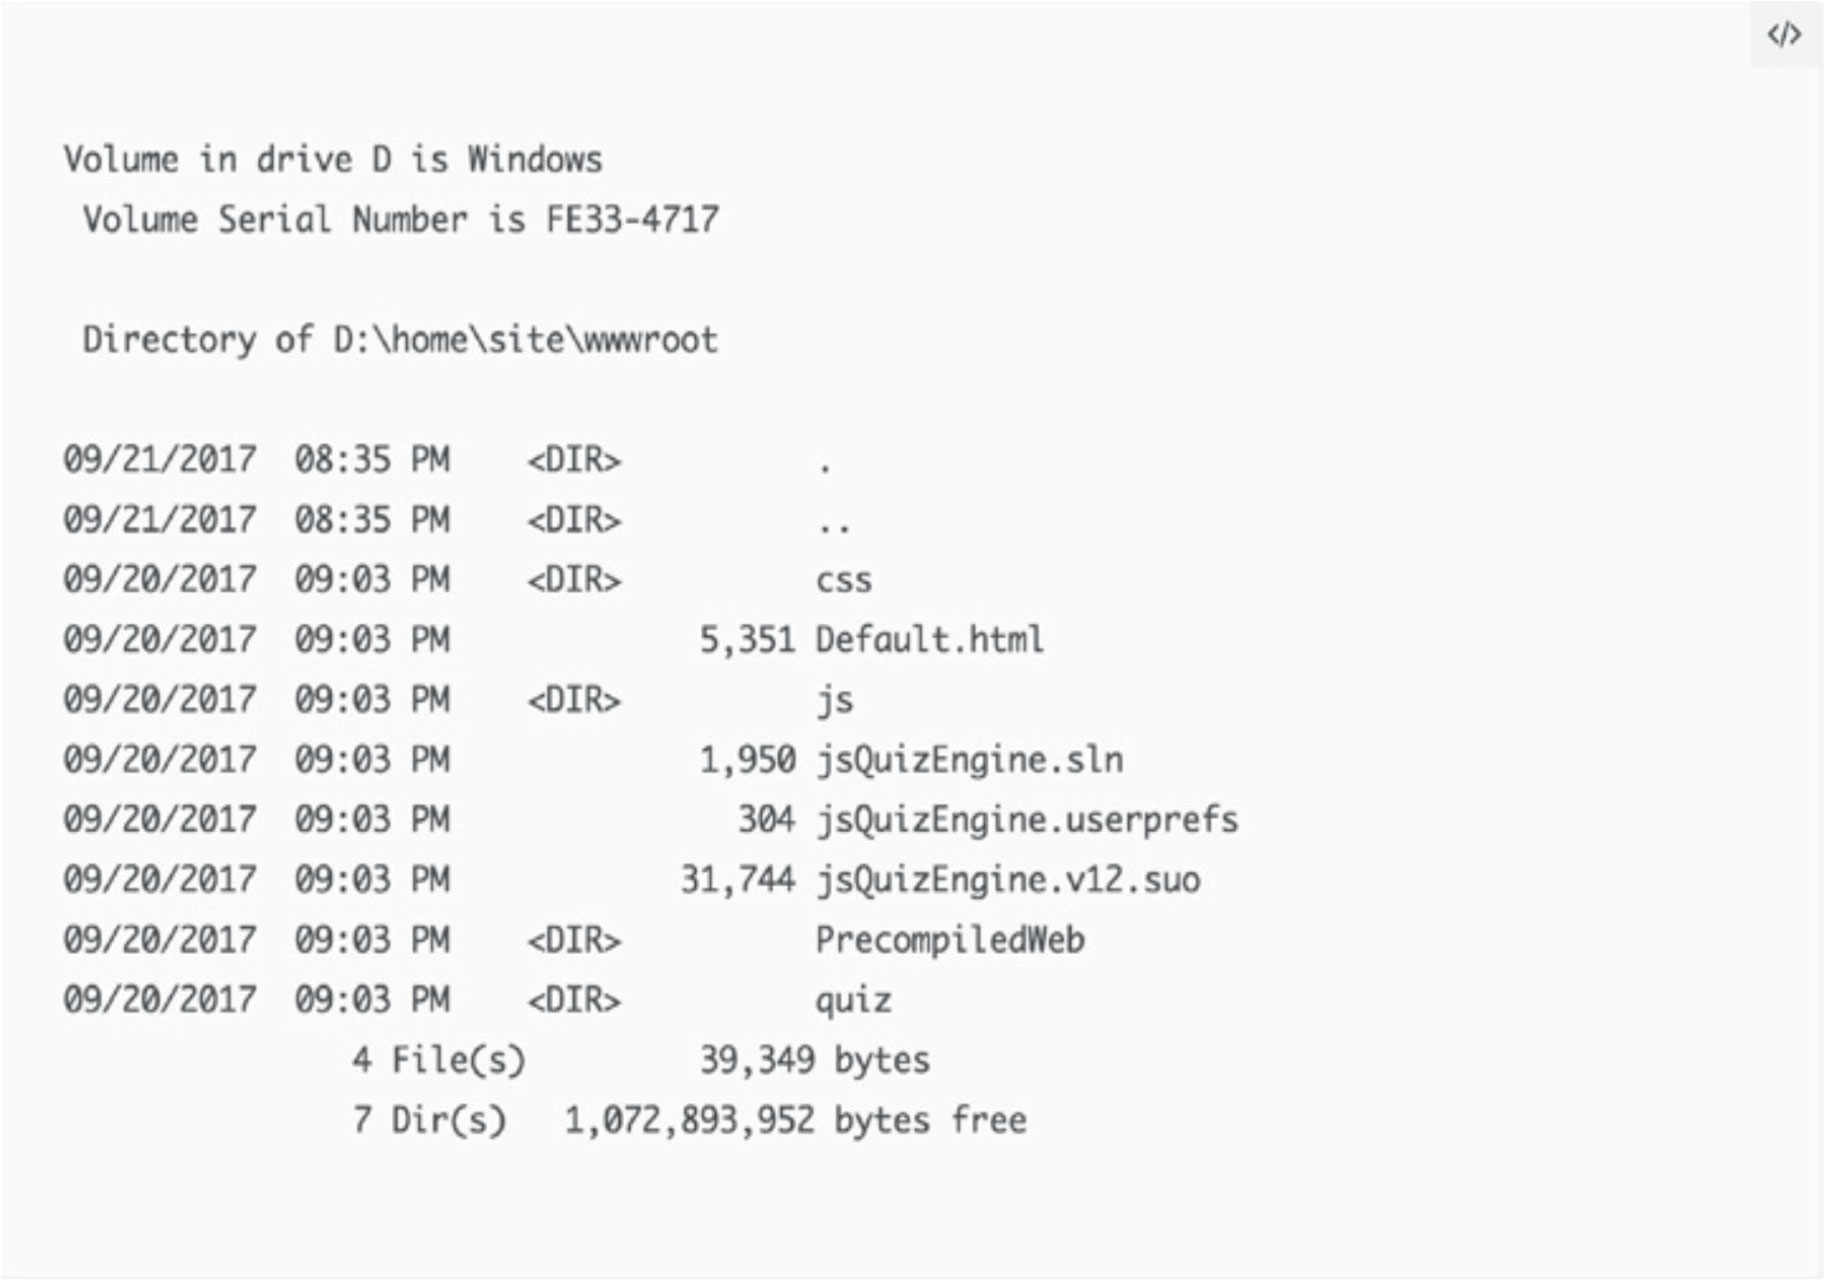
You can do basic commands here and even use TYPE <FILENAME> to parse the output of a file to the screen. You can make a directory and so forth, but keep in mind that this is a sandbox environment and some commands which require elevated permissions may not work.
A VS Code Experience to an Azure App Service
There is also another option that is called App Service Editor located just two items down from Console that you picked before.
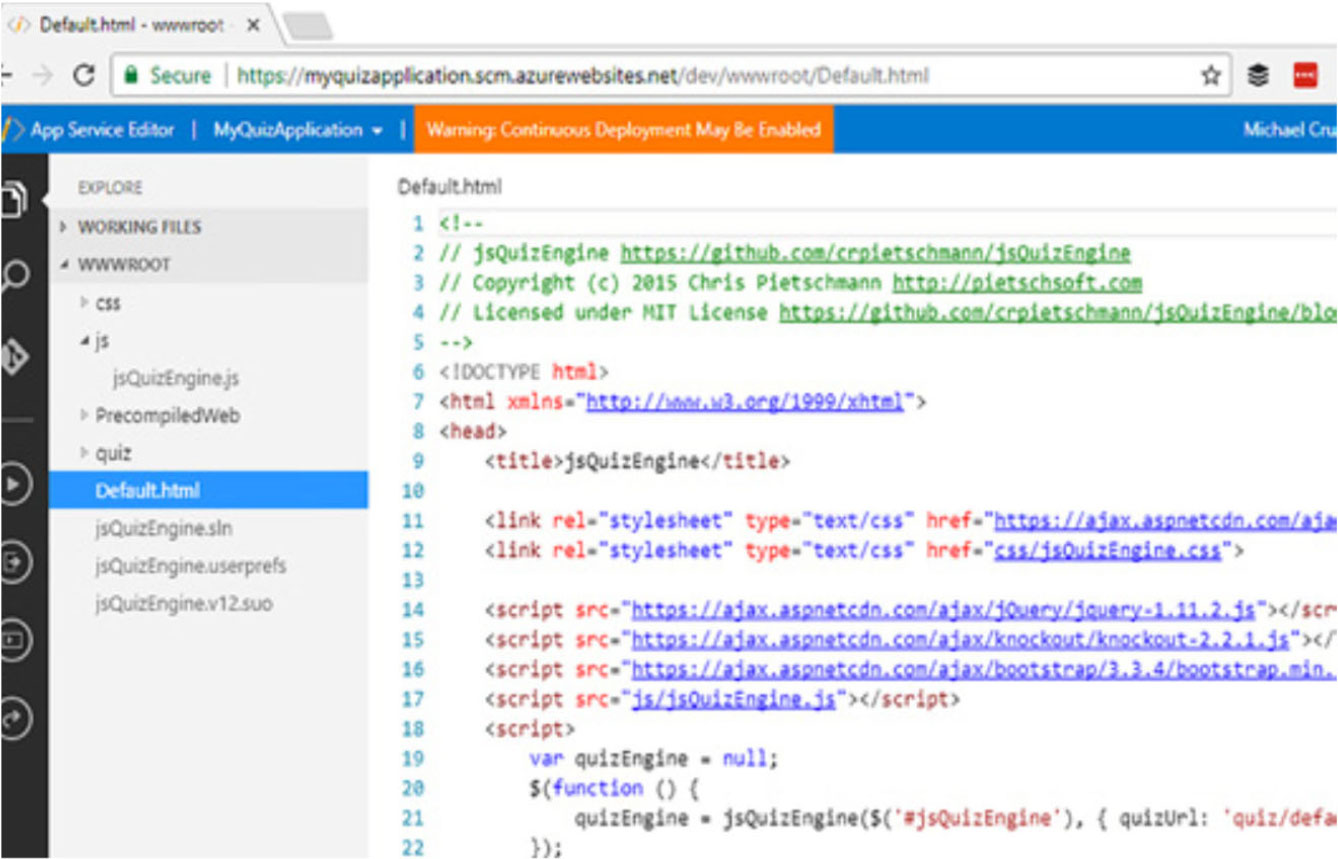
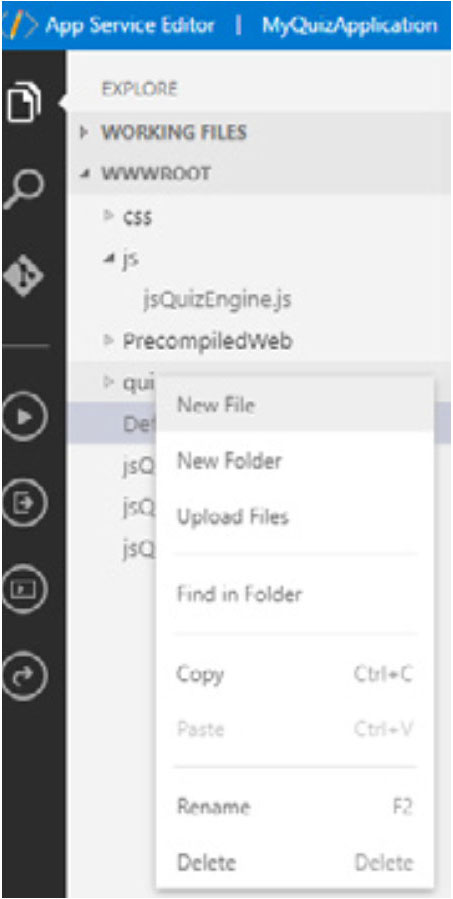
Just like in VS Code, you can modify your settings and even change your theme. No App Service tutorial is complete without mentioning Kudu Diagnostic Console. You can access this from within the App Service Editor under your App name -> Open Kudu Console or through the portal under Advanced Tools.
You can just click on the folder name to navigate or type in the command. You can also easily manipulate the files, but the App Service Editor is better for that functionality. Editor is perfect for lightweight work such as editing files whereas Kudu puts you deep into the weeds with debugging information, file manipulation and more. The main reason to come to the Kudu Diagnostic Console is to download files.
Test Web Apps in Production with Azure App Service
Let’s look at the files inside an Azure App Service website and how you can easily work with them.
Creating Deployment Slot
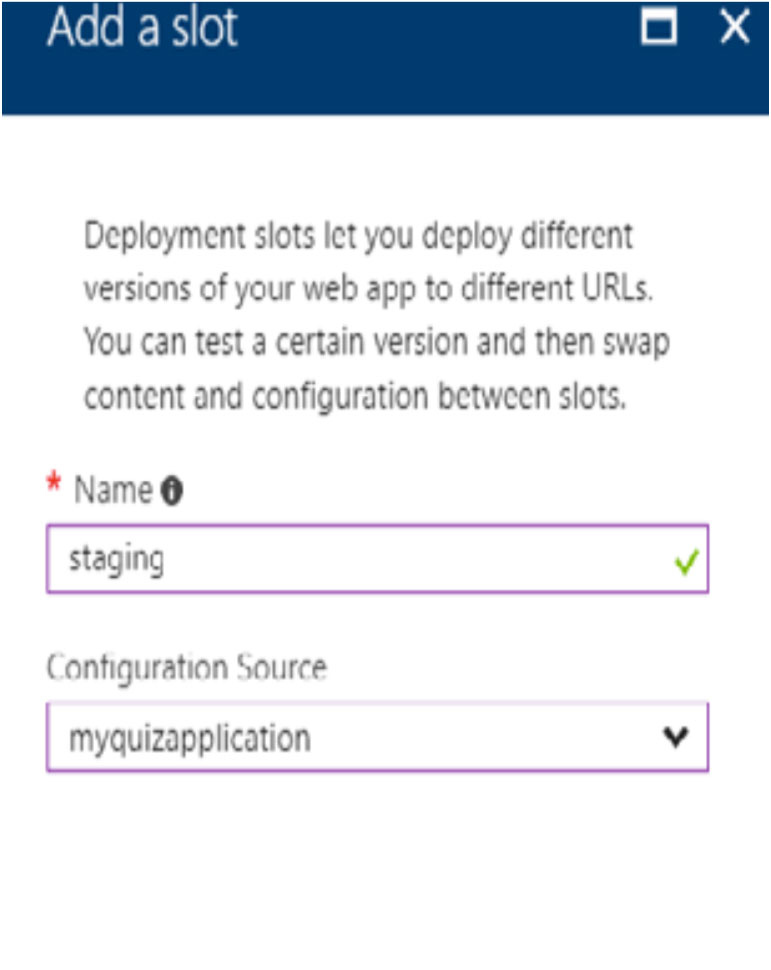
Deployment slots let you deploy different versions of your web app to different URLs. You can test a certain version and then swap content and configuration between slots. Go to the Azure Portal, select My App Service and click on Deployment Slots under Deployment to get started. Then click on the Add Slots button and give it a name such as Staging then use an existing configuration source. We’ll use our ‘Production’ web app – you know, the cool quiz application Aka.ms/azuretips/myquizapp
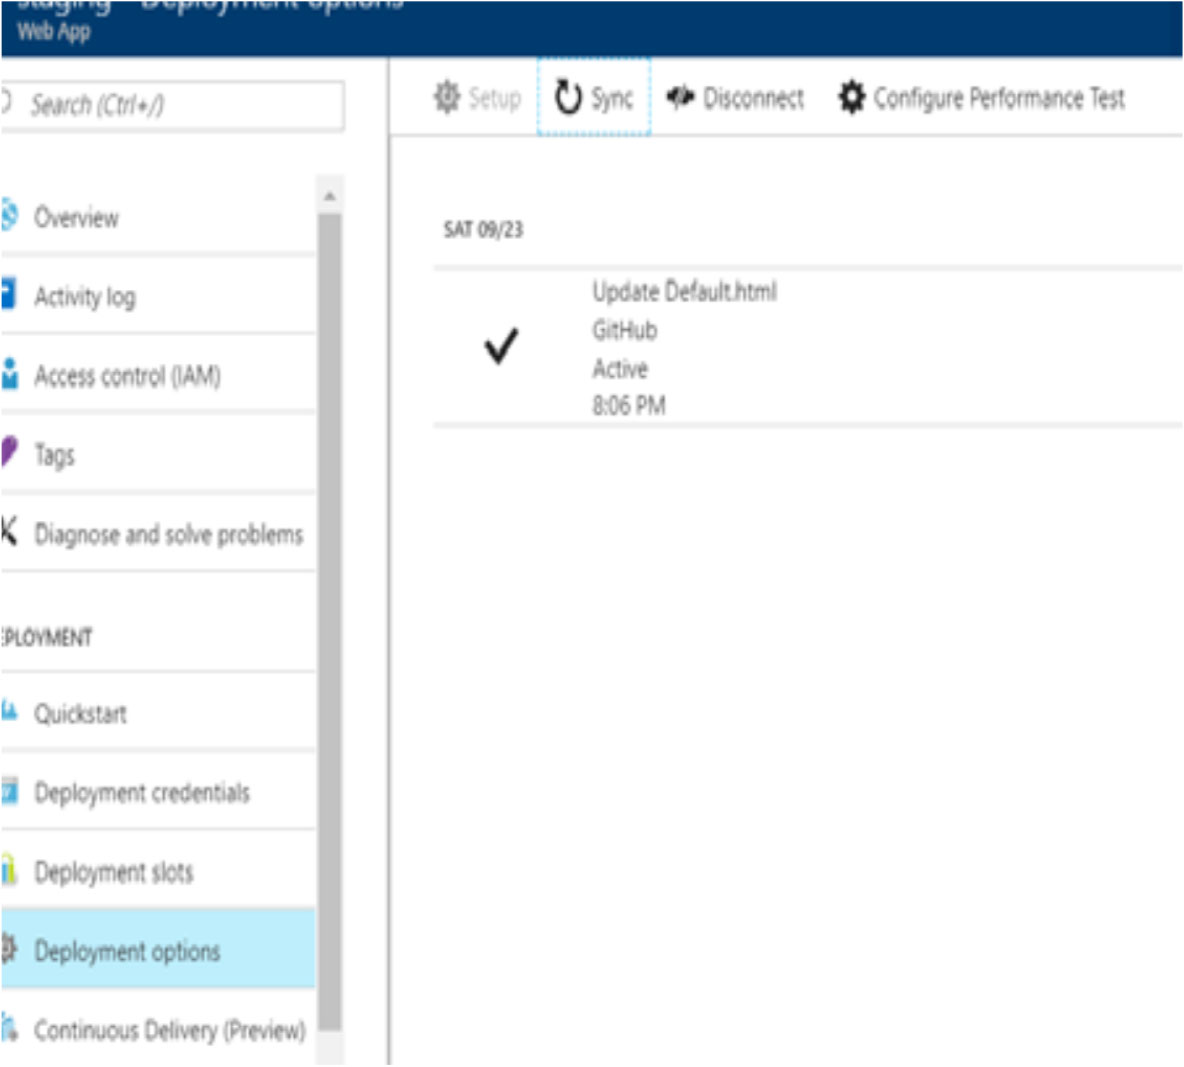
If we now go back to Deployment Slots, we should see it running
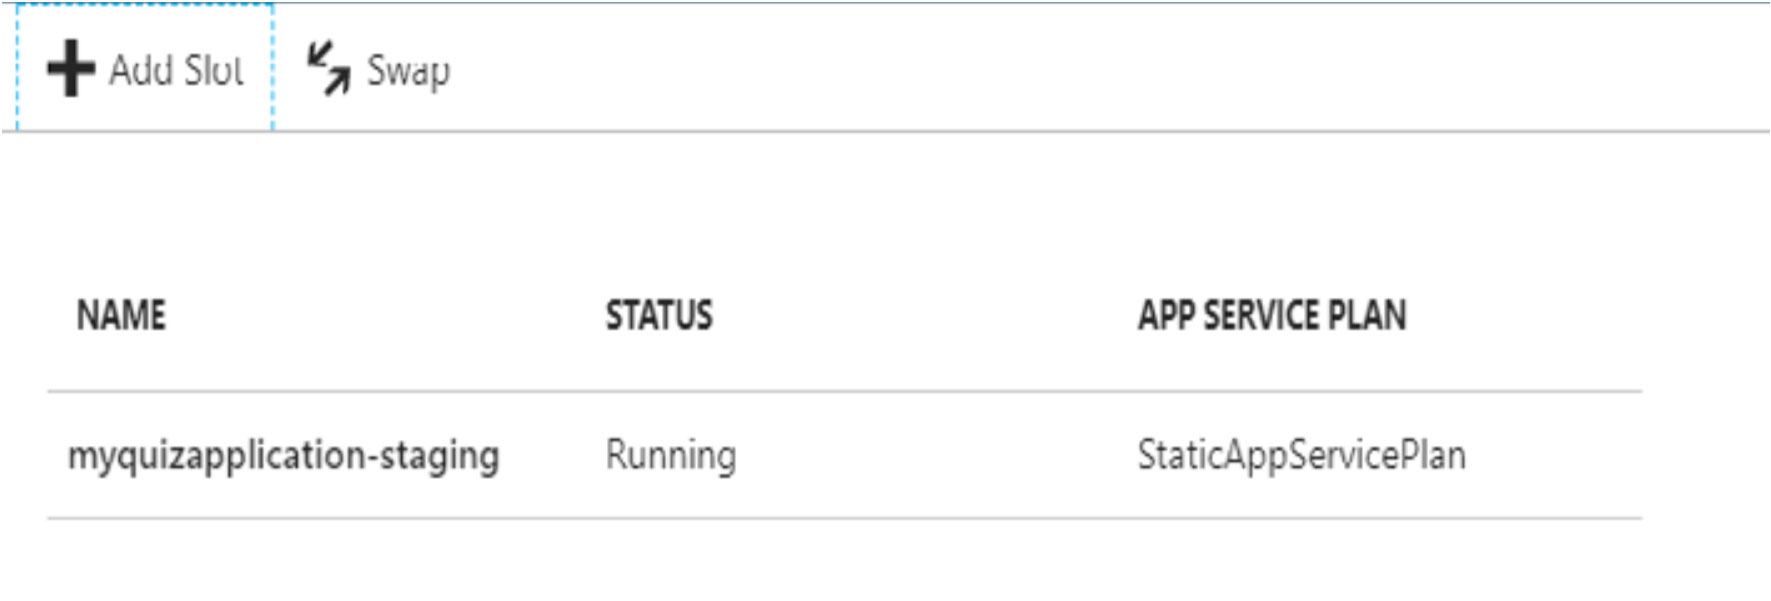
Click on the new staging site that we just created, and you’ll notice that it has appended the word Staging. You’ll also notice we have a new site: Aka.ms/azuretips/quizsourcegit
We need to push a new version of our existing quiz application to this staging slot. Go to Deployment Options and select External Repository. Give it the following URL: Aka.ms/azuretips/quizsource and hit OK. You might have to hit Sync, and you’ll eventually see the following: